Description
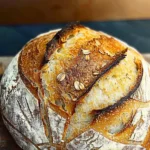
Discover the art of making Farmgirl Sourdough Bread with our step-by-step guide. Master the perfect crust and tangy flavor that will elevate your baking skills today!
Ingredients
Scale
-
400 grams unbleached bread flour (about 3 1/4 cups; a mix of unbleached bread flour, all-purpose, and whole red wheat flour)
-
115 grams active sourdough starter (about 1/2 cup)
-
280 grams lukewarm water (about 1 1/6 cups or 1 cup + 3 tablespoons)
-
8 grams sea salt (about 1 1/4 teaspoons)
Instructions
- The evening prior, refresh the sourdough starter. Allow it to sit in a warm place (78-80°F) to grow, developing bubbles and doubling in size. Once it reaches or nearly reaches its peak fermentation, store it in the fridge overnight.
- On the day you plan to bake, remove the mature starter from the fridge to reach room temperature.
- In a sizable bowl or container, combine the flour and water. Use a dough whisk to blend as thoroughly as possible. This dough has low hydration, so incorporate the ingredients by hand if needed.
- Blend until the flour is fully absorbed. The dough will appear dry and uneven. Cover and let it rest in a warm spot (78-80°F) for at least an hour, up to three hours.
- Spread the mature starter over the dough and sprinkle with salt. Using wet fingers, integrate the starter and salt into the dough by hand. Mix until combined. Cover with a damp cloth or plastic wrap and let it sit for an hour.
- Conduct a series of stretching and folding. With slightly damp hands, grasp the dough and gently stretch it upwards, wiggle a bit, then fold it over the dough center and release. Slightly turn the bowl or container and repeat. Do this about six times until the dough begins to form.
- Execute four sets of stretching and folding at 30-minute gaps. This will strengthen the gluten.
- If the dough isn’t forming, try coil folding.
- Coil folding involves lifting the dough from both sides, letting it fold underneath itself. Rotate the bowl or container and repeat. Allow the dough to rest for 30 minutes between each coil fold.
- Use a kitchen timer to remind you when to perform stretches and folds.
- Allow the dough to rest and expand. By the end of bulk fermentation, it should rise 40-70%, with some bubbles present. The dough edges should be slightly domed where it meets the bowl or container. This can take 3-7 hours, depending on room temperature.
- For bulk proofing, use the oven with just the light on or the proof bread setting. Monitor the temperature with a digital thermometer.
- When the dough is bubbly and has risen 40-70%, pre-shape it. Transfer the dough onto a lightly floured surface. This dough will be sticky, which is desirable!
- Form the dough into rounds. With your left hand, push it away, slightly rotate, and bring it back using a bench scraper, tucking the bottom under to create tension.
- Leave the dough uncovered for a 20-minute rest.
- Form into rounds again. Flip the rounds over (if making multiple loaves, work one at a time) and stretch into a rectangle on a lightly floured surface. Use minimal flour and avoid flouring the top of the dough.
- Fold the end towards you and each side corner towards the center, pressing them onto themselves. Repeat this down the dough, like braiding, pressing each time.
- Starting from the top, roll and tuck the dough into itself, continuing until fully shaped. Use fingers or a bench scraper to tuck the ends and slightly rotate the dough.
- Place in rice-floured bannetons, cover with a plastic bag or inexpensive shower caps to prevent drying during cold proofing.
- *I use a 7 to 8-inch banneton for this recipe!
- Refrigerate the bannetons of dough overnight or up to 36 hours.
- Preheat the oven with the Dutch oven inside for an hour at 550°F.
- Remove the plastic wrap or shower cap from the dough and set aside or dry for reuse.
- Lightly dust with flour and sprinkle with cornmeal. Cover with parchment paper and flip it onto a surface.
- Brush off any hardened excess rice flour.
- Score the bread immediately before baking while it’s cold. Use a bread lame at a 45-degree angle for a deep cut. Make this incision last!
- Transfer the dough into the preheated Dutch oven using the parchment paper.
- Bake at 550°F with the lid on for 20 minutes. Carefully remove the lid and continue baking uncovered at 450°F for 15 minutes. Place a half-sheet pan under the Dutch oven to prevent the bottom from burning. Aim for an internal temperature of 200-205°F.
- Gently remove the bread from the pot and let it cool for at least 1-2 hours before slicing.
Notes
- Ensure the sourdough starter doubles in size for optimal rise and flavor.
- Use lukewarm water in the initial mix to aid moisture absorption and gluten development.
- Score cold dough for cleaner cuts and improved oven spring.
- Prep Time: 15 minutes
- Cook Time: 45 minutes
- Category: Side Dish
- Method: Baking
- Cuisine: Asian
Nutrition
- Calories: 250
- Fat: 12g
- Protein: 8g
Keywords: sourdough bread recipe, active sourdough starter, bulk fermentation process, stretch and fold technique, Dutch oven baking, homemade artisan bread