➤ Table of Contents
I’ll never forget the first time I tried to make beef stew from scratch. It was a gray November afternoon, and I had this romantic vision of tender meat falling apart in rich gravy, vegetables perfectly cooked, the whole house smelling like comfort itself. What I got instead was tough, chewy beef and vegetables that had turned to mush while I waited for that meat to soften. I remember standing in my kitchen, tasting that disappointing broth, wondering where I’d gone wrong.

⚡ Smart Kitchen Tools Every Home Cook Swears By

- Pure aluminum
- Durable enough for everyday cooking
- Made in the USA with quality

- 7 cooking functions in one compact cooker
- 3-quart size ideal for couples or small meals
- Up to 70% faster than traditional cooking

- 3 sizes for every recipe
- Pre-seasoned & durable cast iron
- Oven & grill ready
That failure taught me everything I needed to know about making stews and chilis. These aren’t dishes you can rush. They require patience, the right techniques, and an understanding of how different cuts of meat behave under low, slow heat. But once you learn those secrets, once you understand the magic that happens in a pot that’s been simmering for hours, you’ll have mastered some of the most satisfying, comforting foods you can make.
There’s something deeply nourishing about a bowl of beef stew or a hearty chili. Maybe it’s how the flavors deepen and meld over time, each ingredient contributing to something greater than itself. Or perhaps it’s the way these dishes warm you from the inside out on cold days, filling your kitchen with aromas that make everyone gravitate toward the stove. Whatever it is, stews and chilis represent home cooking at its finest.
This guide covers everything I’ve learned through years of making these dishes. We’ll explore classic beef stews, regional chili variations, Louisiana-style gumbos, and lighter soup options that still deliver big flavor. You’ll learn which cuts of meat work best, how to build layers of flavor, and techniques for getting everything perfectly tender without overcooking. Whether you’re feeding a crowd on game day or meal prepping for the week ahead, you’ll find recipes and methods that actually work in real kitchens with real schedules.
Understanding Beef Stew: The Foundation of Comfort
Beef stew is deceptively simple on paper. Brown some meat, add vegetables and liquid, simmer until tender. But the difference between mediocre stew and the kind that makes people ask for seconds lies entirely in the details. I learned this the hard way, through pots of disappointing stew before I finally cracked the code.

The most important decision you’ll make is choosing the right cut of beef. You want something with good marbling and connective tissue that breaks down during long cooking. Chuck roast is my go-to, cut into generous two-inch cubes. The fat and collagen melt into the stew, creating that silky, rich texture we’re after. Stew meat from the grocery store works fine, but I’ve found that buying a whole chuck roast and cutting it myself gives better results and costs less.
Browning the meat properly is non-negotiable. I know it’s tempting to skip this step when you’re in a hurry, but those caramelized bits stuck to the bottom of your pot are pure flavor. Don’t crowd the pan. Brown the meat in batches if needed, making sure each piece gets real color on at least two sides. That’s where the depth of flavor begins.

The Liquid Question: Broth, Wine, or Beer?
I’ve made beef stew with everything from plain water to expensive red wine, and here’s what I’ve learned. Good beef broth creates a solid foundation, but adding some wine or beer takes it to another level. The alcohol cooks off, leaving behind complexity and richness that water alone can’t provide. I usually do a combination: mostly broth with about a cup of red wine or dark beer.

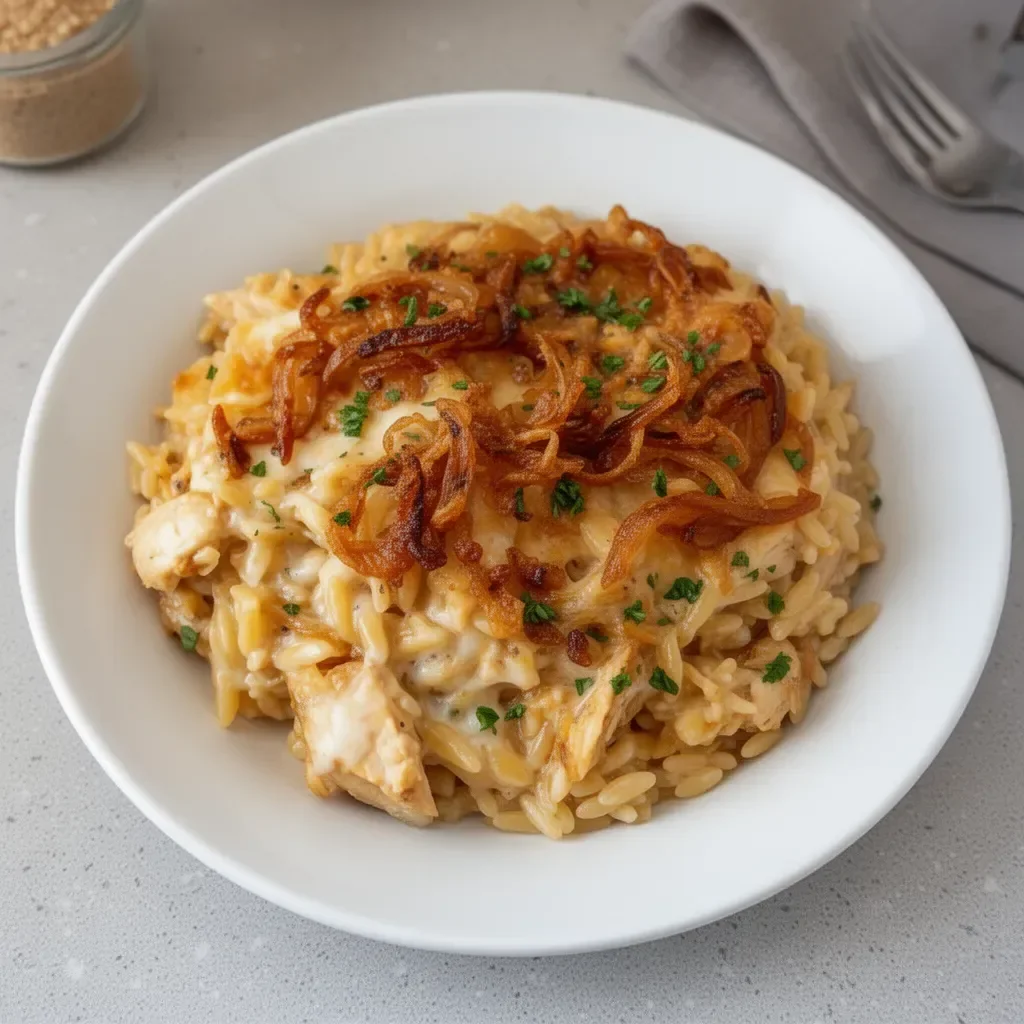
For a classic, foolproof version, my easy ground beef stew uses ground beef instead of chunks, making it faster and more budget-friendly while still delivering that comforting stew experience. It’s perfect for weeknights when you want stew flavor without the long cooking time.
🥗 Fresh, Fast & Foolproof — Upgrades You'll Use Tonight

- Zoodles in seconds
- Heavy-duty, 10 sharp blades
- Keto, paleo & gluten-free friendly

- Meals in ~30 minutes
- 3-Qt — perfect for 1–3 people
- Pressure cook, sauté, steam & more

- Phone alerts & live temp graph
- Hands-off monitoring for smokers
- Perfect doneness, every time
Thickening is another area where people struggle. Some recipes call for coating the meat in flour before browning, others add a roux or slurry at the end. I’ve settled on a hybrid approach: lightly flour the beef before browning to create some thickening power, then let the stew reduce naturally. If it’s still too thin at the end, I’ll mash a few potato pieces against the side of the pot to release their starch.
Vegetable Timing Matters More Than You Think
This is where my early stews went wrong. I’d dump all the vegetables in at the beginning, and by the time the beef was tender, the carrots and potatoes had disintegrated into the broth. Different vegetables need different cooking times, and respecting that makes all the difference.

Root vegetables like carrots, potatoes, and parsnips can handle longer cooking, but even they benefit from being added partway through rather than at the start. I add them during the last hour of cooking. Quick-cooking vegetables like peas or green beans go in during the final fifteen minutes, just long enough to heat through and soften slightly while maintaining their integrity.
The beef stew cooking guide dives deeper into these timing details, showing you exactly when to add each component for perfect results every time. It’s the kind of information I wish I’d had when I was first learning.
Slow Cooker and Crockpot Stews: Set It and Forget It
My slow cooker changed my relationship with beef stew. Suddenly, I could have that long-simmered flavor without watching a pot all day. I could start dinner in the morning before work and come home to a house filled with the aroma of tender beef and vegetables. It felt like magic, even though it’s just smart cooking.

The technique for slow cooker stew differs slightly from stovetop versions. You still want to brown the meat first, which I do in a skillet while the slow cooker preheats. Some people skip this step, but I’ve done side-by-side comparisons, and browning makes a noticeable difference in the final flavor. Those caramelized bits are worth the extra ten minutes.
Liquid amounts need adjusting for slow cookers since there’s minimal evaporation. I use about twenty-five percent less liquid than I would for stovetop stew. The crockpot beef stew recipe has these ratios perfectly calibrated, producing stew with rich, concentrated flavor rather than watery broth.
Low and Slow: Temperature and Time
The beauty of slow cooker stew is in the name: slow. I always cook on low for seven to eight hours rather than high for four to five. The longer, gentler cooking produces more tender meat and better developed flavors. High heat works in a pinch, but low is worth the wait if your schedule allows it.
One trick I’ve learned is to add a splash of something acidic near the end of cooking. A tablespoon of vinegar or squeeze of lemon juice brightens all those deep, rich flavors that developed over hours. It’s a small thing that makes a big impact, cutting through the richness and making each spoonful more interesting.
For the ultimate hands-off version, the slow cooker beef stew walks you through the entire process from start to finish, including make-ahead tips and storage instructions. I make a double batch and freeze half for those nights when I need comfort food fast.
Best Ever Beef Stew: What Makes It Special
Every cook has their version of the “best ever” beef stew, usually involving some secret ingredient or technique passed down through generations. Mine comes from years of testing and tasting, combining the best elements from a dozen different recipes into one reliable formula.

What makes the best ever slow cooker beef stew recipe stand out is the layering of flavors. We’re talking tomato paste caramelized in the pan drippings, a splash of Worcestershire for umami depth, and fresh thyme that perfumes everything. It’s still beef stew at its core, but with thoughtful touches that elevate it beyond basic.
I serve this for company without hesitation. With crusty bread for dipping and a simple green salad, it’s a complete meal that feels both rustic and refined. The slow cooker does all the work while you focus on setting a nice table and enjoying your guests.
Chili: America’s Great Comfort Food Debate
If you want to start an argument among home cooks, just bring up chili. Should it have beans? What kind of meat? Tomatoes or no tomatoes? Ground beef or chunks? Every region, every family, every cook has strong opinions about what makes “real” chili. I’ve learned to appreciate them all, because honestly, every version has something wonderful to offer.

My own chili evolution started with basic ground beef and canned kidney beans, the kind my mom made when I was growing up. Over time, I’ve experimented with Texas-style beanless chili, Cincinnati-style with chocolate and cinnamon, white chicken chili, and everything in between. Each one taught me something about building flavor and balancing heat with richness.
The foundation of good chili, regardless of regional style, is developing deep flavor through layering. You start with browning your protein, whether that’s ground beef, chunks of chuck roast, or a combination. Then you bloom your spices in the rendered fat, which releases their essential oils and creates a more complex flavor base than just dumping spices into liquid.
The Spice Situation: Chili Powder and Beyond
Chili powder is not created equal. The stuff in the spice aisle is usually a blend of ground chiles with cumin, garlic powder, and other seasonings. It works fine, but making your own blend from individual dried chiles takes things to another level. I keep ancho, guajillo, and chipotle powders on hand and mix my own chili base for each pot.

Cumin is essential, providing that earthy, warming quality we associate with chili. But it’s easy to go overboard. I’ve learned to start with less than I think I need, then taste and adjust. Same with heat. You can always add more cayenne or chipotle, but you can’t take it out once it’s in there.
My basic chili recipe provides a solid template that you can adapt based on your preferences. It includes beans because I love their creamy texture and how they soak up all those spices, but you can easily leave them out if you’re a purist.
Crockpot Chili for Easy Entertaining
Chili might be the perfect slow cooker recipe. The long, gentle cooking melds all the flavors together while tenderizing the meat. Plus, you can make a huge batch and keep it warm for hours, perfect for game day gatherings or casual parties where people eat at different times.

I brown the meat and aromatics first, then transfer everything to the slow cooker with the remaining ingredients. The crockpot chili bubbles away for six to eight hours, filling the house with incredible aromas and getting better as it cooks. By dinnertime, the flavors have melded into something greater than the sum of its parts.
One advantage of slow cooker chili is that it holds well. You can make it a day ahead and reheat it, and honestly, it usually tastes even better the next day. The flavors have had more time to marry, the texture improves, and any excess fat rises to the top where you can skim it off if desired.
Regional Chili Variations Worth Exploring
Once you’ve mastered basic chili, the regional variations become fascinating. Each one reflects local ingredients, cultural influences, and strong opinions about what chili should be. I love exploring these different styles because they’ve expanded my understanding of what this dish can be.

Texas-style chili is all about the meat and the chiles, with no beans allowed and no tomatoes either in the strictest interpretations. It’s deeply beefy, spicy, and rich, almost like a thick sauce. The Texas-style beef chili uses chunks of beef chuck rather than ground meat, simmered low and slow until the meat is fall-apart tender.
The first time I made Texas chili, I was skeptical about the no-bean rule. How could it be filling enough? But the generous amount of meat and the thick, chile-rich sauce proved me wrong. Served over rice or with cornbread, it’s incredibly satisfying. The meat chunks give you something substantial to bite into, and the deep, complex chile flavor makes each spoonful interesting.
Pioneer Woman’s Approach to Chili
Ree Drummond’s recipes have taught me that comfort food doesn’t have to be complicated to be delicious. Her chili philosophy embraces accessibility and crowd-pleasing flavors without sacrificing quality. The Pioneer Woman chili combines ground beef with beans, tomatoes, and a straightforward spice blend that delivers every time.
What I appreciate about this style is its reliability. You’re not hunting down obscure ingredients or following complicated techniques. You’re making honest, hearty chili that feeds a crowd and makes everyone happy. Sometimes that’s exactly what you need.
I make this version for large gatherings because it scales up easily and everyone from kids to grandparents enjoys it. Set out a toppings bar with shredded cheese, sour cream, diced onions, jalapeños, and crackers, and people can customize their bowls however they like.
Unusual Chili Twists That Actually Work
Some chili variations sound weird until you try them, then you’re a convert. The chili with peanut butter and chocolate falls into this category. I was dubious when I first heard about it, but the peanut butter adds richness and body, while the chocolate provides depth without making it taste sweet.

This style is sometimes called Cincinnati chili, though that’s actually a different specific recipe. The peanut butter and chocolate create an almost mole-like complexity, warming spices playing against subtle sweetness. It’s definitely different from standard chili, but in a way that keeps you coming back for another taste, trying to figure out what makes it so interesting.
For the ultimate meat-focused approach, the carnivore chili recipe strips everything down to beef, spices, and fat. No beans, no vegetables, no fillers. Just pure, meaty chili that carnivore diet followers can enjoy. Even if you’re not following that diet, it’s an interesting exploration of how much flavor you can build with minimal ingredients.
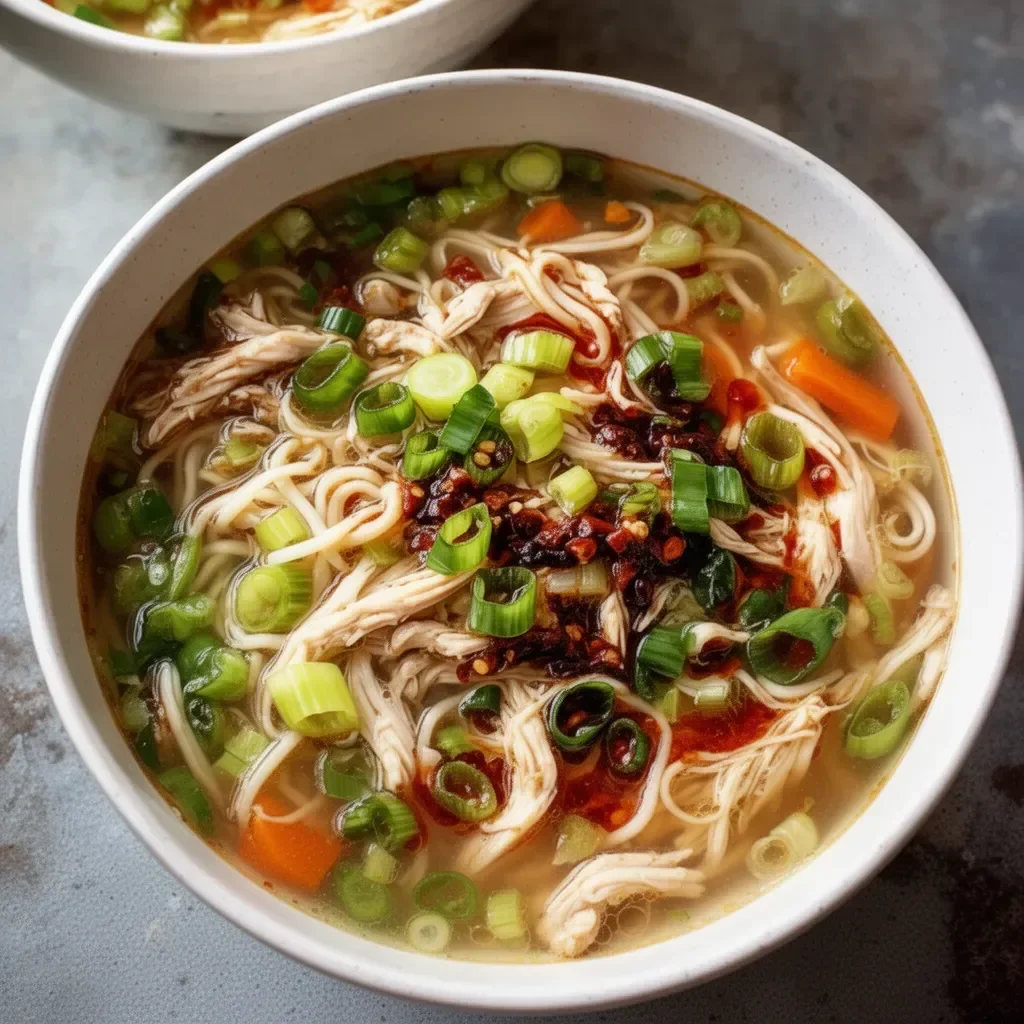
Chicken Chili and Lighter Options
Not every chili needs to be a heavy, beef-based bowl of richness. Chicken chili offers a lighter alternative that’s just as satisfying, with its own appeal and flavor profile. I started making chicken chili on weeknights when I wanted something comforting but not quite as heavy as beef versions.

The key to great chicken chili is preventing the meat from drying out. I use boneless thighs rather than breasts because they stay moist and tender even with longer cooking times. You can use breasts if you prefer, but watch the cooking time carefully and consider adding them later in the process.

White chicken chili, made with white beans and often featuring green chiles, has become one of my go-to recipes. The street corn chicken chili takes inspiration from elote, adding corn, cotija cheese, and lime to create something bright and fresh while still being hearty and warming.
The Magic of Street Corn Flavors
Combining chili with street corn flavors was one of those “why didn’t I think of this sooner” moments. The sweet corn, tangy lime, creamy cheese, and slight heat from chiles create layers of flavor that make each bite exciting. It’s comfort food with a Mexican-inspired twist that feels special without being complicated.
I make this for gatherings when I want to serve something a little different from standard chili. The vibrant flavors and colorful presentation always get compliments, and it’s actually quite easy to pull together. The corn adds natural sweetness that balances the heat, while the lime juice brightens everything up.
Toppings are essential for this one. I set out fresh cilantro, extra cotija or queso fresco, lime wedges, diced avocado, and crushed tortilla chips. People pile their bowls high with toppings, creating their own perfect combination. It’s interactive and fun, which adds to the whole experience.
Gumbo: Louisiana’s Gift to the Soup World
Gumbo holds a special place in my heart, even though I didn’t grow up eating it. The first time I had real Louisiana gumbo was at a tiny restaurant in New Orleans, and I was blown away by the depth of flavor and the way every element worked together. I’ve been trying to recreate that experience in my own kitchen ever since.

The foundation of gumbo is the roux, and making a proper dark roux requires patience and constant attention. You’re cooking flour and fat together until it reaches a deep, chocolate-brown color. This process can take thirty to forty-five minutes, and you can’t walk away from the stove because it can burn in seconds. But that dark roux is what gives gumbo its distinctive color and nutty, complex flavor.
My basic gumbo recipe walks you through the roux-making process step by step, explaining exactly what to look for at each stage. It’s intimidating at first, but once you’ve successfully made a dark roux, you’ll feel like you’ve unlocked a cooking superpower.
Chicken and Sausage: The Classic Combination
Chicken and sausage gumbo is probably the most popular version, and for good reason. The smoky andouille sausage provides deep flavor while the chicken adds protein and substance. The combination works beautifully, each element supporting the others.
The chicken and sausage gumbo is my most-made version because it’s accessible and crowd-pleasing. You don’t need exotic ingredients, and most grocery stores carry andouille sausage these days. If you can’t find it, any good smoked sausage works, though you might want to add a bit more cayenne for heat.
I like to brown the sausage first, removing it and using the rendered fat as part of my roux base. This adds another layer of smoky flavor throughout the entire pot. Then I poach chicken thighs in the gumbo, shredding them once they’re cooked and stirring the meat back in. It’s more flavorful than using pre-cooked chicken and keeps everything moist.
Cajun Variations and Seafood Gumbo
Once you’ve mastered the basic technique, Cajun variations become endlessly interesting to explore. The Cajun chicken and sausage gumbo amps up the spice with more cayenne and black pepper, plus the holy trinity of onions, celery, and bell peppers in generous proportions.
Seafood gumbo is a different beast entirely, typically featuring shrimp, crab, and sometimes oysters. The Louisiana seafood gumbo is special occasion food, more expensive and a bit more delicate to prepare since you don’t want to overcook the seafood. But when you nail it, it’s restaurant-quality food that makes people feel pampered.
I add the seafood at the very end, just simmering until the shrimp turn pink and everything is heated through. Overcooking makes shrimp rubbery and tough, which would be a shame after all the work that went into the roux and building the flavor base. Serve it over rice with plenty of hot sauce on the side, and you’ve got something truly special.
Mexican-Inspired Stews and Chile Verde
Mexican cuisine has given us some incredible stew traditions, from pozole to birria to chile verde. These dishes bring different spices and techniques to the stew world, expanding what we think of as comfort food. I started exploring these recipes when I got bored with the same rotation of beef stew and wanted something with brighter, fresher flavors.

Chile verde, or green chili, is one of my absolute favorites. It’s built around pork shoulder and green chiles, simmered until the meat is fall-apart tender and the sauce is rich and tangy. The Mexican beef green chile adapts this concept for beef, creating a versatile dish that works for tacos, burritos, or just eating with a spoon from a bowl.
The green chiles can be fresh poblanos or Hatch chiles when they’re in season, or canned roasted green chiles for year-round convenience. I’ve made it both ways, and while fresh chiles have better flavor and texture, canned chiles make a perfectly acceptable weeknight version. The key is getting enough chile flavor without making it overwhelmingly spicy.
Building Mexican Stew Flavors
What I love about Mexican-style stews is how they balance richness with brightness. Where European-style stews tend toward dark and savory, Mexican stews incorporate fresh herbs, citrus, and chiles that keep things lively. The long-simmered meat provides comfort and substance, but the flavors stay vibrant.
Cumin and oregano are your friends here, but Mexican oregano if you can find it. It has a slightly different, more citrusy flavor than Mediterranean oregano. Fresh cilantro goes in at the end, along with a squeeze of lime juice to wake everything up. These finishing touches make a big difference.
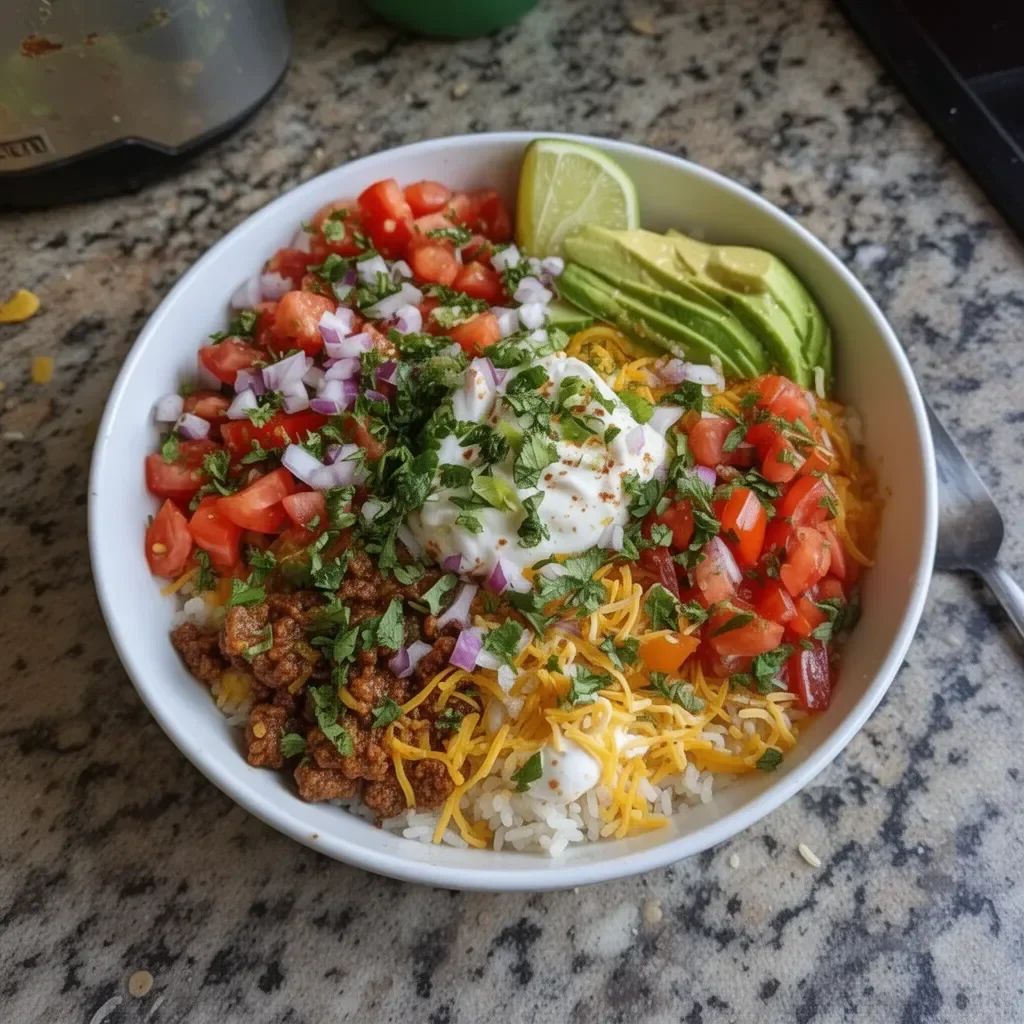
I serve Mexican stews with warm tortillas, rice, beans, and all the fixings. Let people build their own plates, adding salsa, sour cream, cheese, and fresh vegetables as they like. It’s interactive and fun, and everyone gets exactly what they want.
Hearty Soups and Lighter Stew Options
Sometimes you want the comfort of a stew without quite as much richness. That’s where hearty soups come in, offering warmth and satisfaction with a lighter feel. These are the recipes I turn to when I want something nourishing but not heavy, or when I’m looking for healthier options that don’t sacrifice flavor.

The one pot lasagna soup captures all the flavors of lasagna in soup form, with pasta, Italian sausage, tomatoes, and cheese. It’s genius in its simplicity, delivering that lasagna experience without the layering and baking time. Perfect for weeknight dinners when you’re craving Italian comfort food.
What makes this work is cooking the pasta directly in the soup, where it absorbs all those Italian flavors while it softens. I use broken lasagna noodles, but any pasta shape works. The soup thickens as the pasta releases starch, creating a hearty, almost stew-like consistency that’s incredibly satisfying.
Cabbage Soups for Healthy Comfort
Cabbage is an underappreciated soup ingredient, providing bulk and nutrition without heaviness. The low calorie cabbage fat burning soup has become a staple for me when I want something filling and healthy. It’s loaded with vegetables and surprisingly flavorful for something so light.
The key to good cabbage soup is not overcooking it. You want the cabbage to soften but still have some texture. If you cook it too long, it becomes mushy and develops that sulfurous smell that gave cabbage a bad reputation in the first place. Add it during the last twenty to thirty minutes of cooking.
For a heartier version, the cabbage bacon and sausage soup adds smoky meat and creamy potatoes to create something more substantial. The bacon fat provides richness, while the sausage makes it feel like a complete meal. It’s still vegetable-forward, but with enough protein and fat to be truly satisfying.
Weight Watchers and Healthy Variations
I’m not on Weight Watchers, but I appreciate recipes that deliver flavor without excessive calories or points. The Weight Watchers cabbage soup proves that healthy eating doesn’t mean bland food. It’s well-seasoned and satisfying, the kind of soup you can eat a big bowl of without guilt.

These lighter soups are perfect for meal prep too. I make a big batch on Sunday and portion it into containers for the week. Having healthy, homemade soup ready to grab makes it so much easier to eat well during busy weeks. Just heat and eat, maybe with a piece of crusty bread or a simple salad alongside.
The creamy spicy jalapeño popper soup is my go-to when I want something with more personality. It captures the flavors of jalapeño poppers in soup form, with cream cheese, bacon, and plenty of jalapeños. It’s indulgent but not as heavy as it sounds, and the spice level is customizable.

Southern Comfort: Butter Beans and Red Beans
Southern cooking has given us some of the most comforting stew-like dishes in American cuisine. These recipes come from a tradition of making something delicious from simple, affordable ingredients. They’re the kind of food that sticks to your ribs and warms your soul, especially on cold days.

Butter beans are different from lima beans, though they’re related. They’re creamier and more tender, with a rich, almost buttery flavor that explains their name. The crockpot butter beans stew Oklahoma is pure comfort food, slow-cooked with ham hock or bacon until the beans are tender and the broth is rich and porky.

This is the kind of dish my grandmother would have made, simple ingredients transformed through patient cooking into something greater than the sum of its parts. The ham hock breaks down over hours of cooking, flavoring the beans and creating a silky broth. Serve it with cornbread for soaking up that delicious liquid, and you’ve got a meal that feels like a hug.
Red Beans and Rice: Monday Tradition
In New Orleans, red beans and rice is traditionally a Monday dish, made from the weekend’s leftover ham bone. The Louisiana red beans and rice follows this tradition, using dried red beans simmered low and slow with the holy trinity, andouille sausage, and Creole seasoning.

What makes this dish special is the creamy texture of the beans. As they cook, some of them break down, thickening the liquid into something almost gravy-like. I help this along by mashing a few beans against the side of the pot toward the end of cooking. This creates that characteristic creamy consistency without adding any dairy.
The beans need to cook until they’re completely tender, which takes several hours. There’s no rushing it. Undercooked red beans are unpleasant, chalky in texture and hard to digest. But properly cooked beans are creamy, rich, and incredibly satisfying. Serve them over white rice with hot sauce on the side, and you understand why this simple dish has such staying power.
Casseroles and Baked Stew Variations
Sometimes you want stew flavors but in a format that’s easier to serve a crowd or that can be made ahead and baked when needed. That’s where casseroles and baked variations come in, combining the best of both worlds. These dishes capture the comfort of stew with the convenience of one-pan baking.

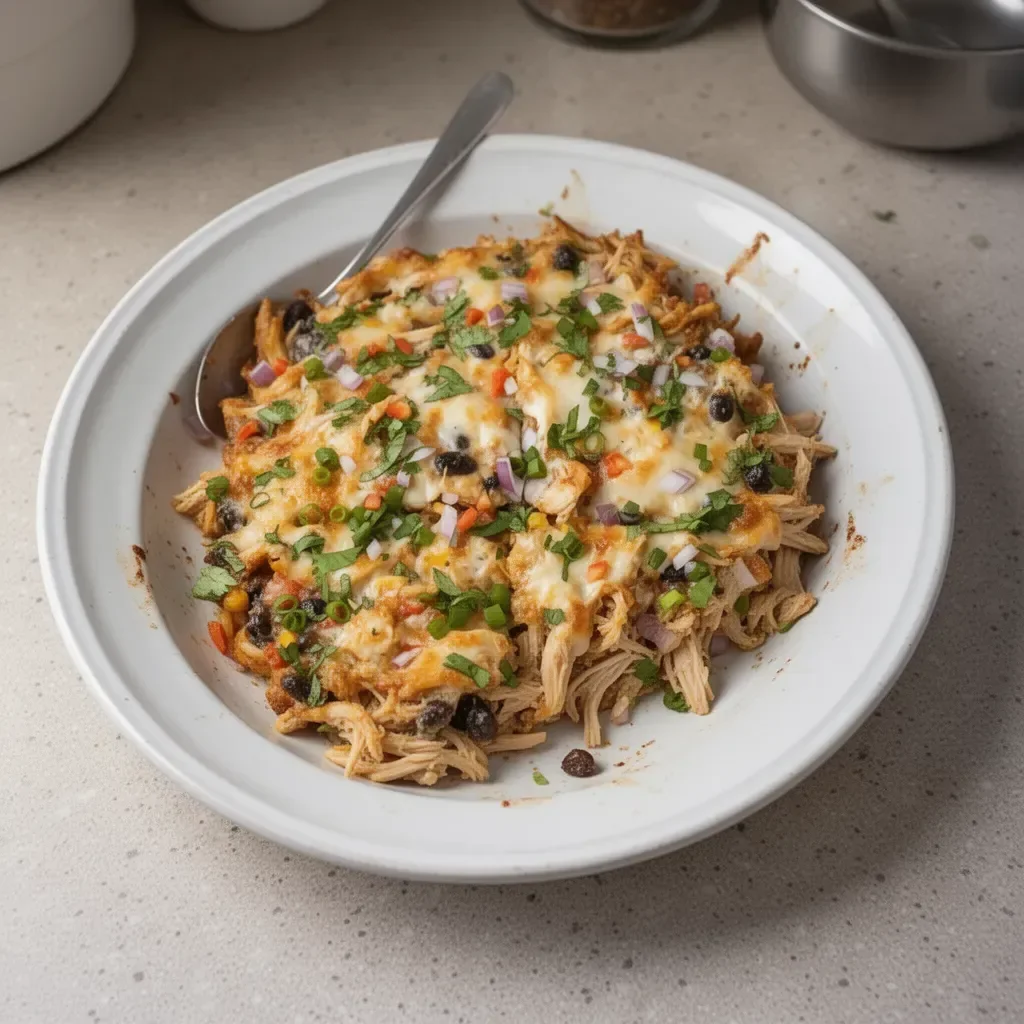
The beef enchilada casserole layers seasoned ground beef, tortillas, enchilada sauce, and cheese into something that’s part casserole, part enchiladas, part comfort food magic. It has that Mexican-inspired flavor profile that keeps you coming back for another bite, with layers of texture from soft tortillas to crispy edges to gooey cheese.

I love this for feeding a crowd because it holds well and serves easily. You can make it ahead, refrigerate it, and bake it when you’re ready. The flavors actually improve with a few hours of rest, giving everything time to meld. Just add fifteen minutes to the baking time if you’re starting from cold.
Building Casserole Layers for Maximum Flavor
The key to a great casserole is building flavors in layers and ensuring proper moisture levels. Too dry and it’s bland and hard to eat. Too wet and it becomes soupy. You want enough sauce to keep everything moist but not so much that it’s swimming.

For beef casseroles, I brown the meat thoroughly first, draining excess fat but leaving enough for flavor. Then I build the seasoning in the pan, letting spices bloom in that hot fat before adding liquids. This creates deeper flavor than just mixing everything together.
Cheese goes on top for the final fifteen minutes of baking so it gets melted and bubbly but doesn’t burn. I like a mix of shredded cheese for melting and a bit of crumbled queso fresco or cotija for texture and authentic flavor. The combination gives you gooey comfort with pockets of tangy, creamy cheese throughout.
Expert Tips for Perfect Stews and Chilis Every Time
After making hundreds of pots of stew and chili over the years, I’ve learned some tricks that make a real difference. These are the details that separate good from great, the little things that add up to consistently excellent results.

First, resist the urge to peek and stir constantly. Every time you lift the lid, you lose heat and moisture. This extends cooking time and can dry out your dish. Trust the process, keep the lid on, and only stir when necessary. For stovetop stews, a quick stir every thirty to forty-five minutes is plenty.
Season in layers throughout the cooking process rather than adding all your salt at once. Start with a moderate amount when browning meat, add more with your vegetables, and season the liquid. Then taste and adjust at the end. This creates more complex seasoning than dumping everything in at once.
Common Mistakes and How to Avoid Them
The biggest mistake I see is using heat that’s too high. Stews and chilis should barely bubble, with just the occasional gentle blip rising to the surface. Rapid boiling makes meat tough and causes vegetables to fall apart while the meat is still tough. Low and slow wins every time.

Another common error is adding dairy too early. If your recipe includes sour cream, cream, or cheese, stir it in at the very end or serve it on top. High heat and long cooking times can cause dairy to curdle or separate, creating an unappetizing texture. The exception is cream cheese, which tends to be more stable.
Don’t forget the importance of resting. Stew and chili are almost always better the next day after flavors have had time to meld. If possible, make your dish a day ahead, refrigerate it overnight, and reheat gently before serving. This also makes it easier to skim any excess fat that rises to the surface and solidifies.
Time-Saving Tricks for Busy Cooks
Pressure cookers and Instant Pots have revolutionized stew-making for busy families. What used to take three hours can happen in forty-five minutes, with results that are remarkably close to traditional slow cooking. The meat becomes tender, flavors concentrate, and you’re eating dinner instead of waiting for it.

Prep ingredients the night before when making slow cooker recipes. Brown your meat, chop vegetables, and measure spices. Store everything in the fridge, then dump it in the slow cooker the next morning. Those few minutes of evening prep mean you can have dinner cooking in under five minutes before work.
Freeze portions of leftover stew and chili in single-serving containers. They reheat beautifully and become emergency dinners on nights when cooking from scratch isn’t happening. I always make extra just for freezing, treating it like meal prep insurance for future busy nights.
Conclusion: Your Stew and Chili Journey
We’ve covered a lot of ground together, from basic beef stew techniques to regional chili variations to Louisiana gumbos and beyond. What I hope you take away from all this is that making great stews and chilis isn’t about following rules rigidly. It’s about understanding the principles, then making them your own.

These dishes are forgiving and flexible. You can adjust spices to your taste, swap ingredients based on what you have available, and experiment with different combinations. Some of my best recipes came from happy accidents or necessary substitutions that turned out better than the original plan.
The most important lessons are simple: use good meat, don’t rush the cooking, build flavor in layers, and taste as you go. Whether you’re making a quick weeknight chili or a slow-simmered Sunday stew, these principles will guide you toward delicious results. Trust your instincts, be patient with the process, and enjoy the wonderful aromas filling your kitchen.
Start with the recipes that appeal to you most, master those, then branch out to try new variations. Every pot teaches you something, and before long, you’ll be creating your own versions based on what you’ve learned. That’s when cooking becomes truly satisfying, when you move from following recipes to understanding food.
Explore more delicious comfort food inspiration:
Frequently Asked Questions
What’s the best cut of beef for stew?
Chuck roast is the gold standard for beef stew. It has enough marbling and connective tissue to become tender and flavorful with long cooking. Cut it into generous two-inch cubes for the best texture. Round cuts work too but tend to be leaner and can dry out more easily.
How do I thicken stew without flour?
Mash some of the cooked potatoes or vegetables against the side of the pot and stir them back in. The released starch will thicken the liquid naturally. You can also puree a cup of the stew in a blender and stir it back in for body without changing the flavor.
Can I make chili in advance?
Absolutely, and it’s actually better that way. Chili benefits from sitting overnight as flavors meld and deepen. Make it up to three days ahead, store it in the fridge, and reheat gently on the stovetop. You can also freeze it for up to three months.
Should chili have beans?
This depends entirely on regional preference and personal taste. Texas-style purists say no, while most other styles include beans. There’s no right answer. Make what you enjoy eating, and don’t worry about authenticity police.
How long does gumbo last in the refrigerator?
Properly stored gumbo keeps for three to four days in the refrigerator. The flavors continue developing, so day-two gumbo is often even better than freshly made. Reheat it gently, adding a splash of stock if it’s thickened too much.
Can I freeze stew with potatoes?
You can, but the potatoes may become grainy or mealy after freezing and thawing. If you plan to freeze your stew, consider leaving potatoes out and adding fresh ones when you reheat. Or accept that the texture will change slightly but the flavor remains good.
What’s the difference between stew and soup?
Stew is thicker, with less liquid relative to solid ingredients. The cooking liquid becomes a rich sauce rather than a broth. Soup has more liquid and is typically eaten with a spoon, while stew is thick enough that ingredients hold together on a fork.
How do I make my chili less spicy after it’s cooked?
Add more tomatoes, beans, or broth to dilute the heat. A dollop of sour cream or a sprinkle of cheese on top also helps balance spiciness. For next time, start with less heat and build up gradually, tasting as you go.
Why is my beef stew meat tough?
It hasn’t cooked long enough. Tough cuts need extended cooking time to break down connective tissue. Keep simmering until the meat is fork-tender. Also ensure your heat isn’t too high, which can make meat seize up and toughen.
Can I use a slow cooker recipe on the stovetop?
Yes, but adjust cooking time significantly. What takes eight hours on low in a slow cooker might take two to three hours simmering on the stovetop. Check your dish regularly and adjust liquid levels as needed since stovetop cooking has more evaporation.
What’s the secret to rich, dark gumbo?
A properly made dark roux is essential. Take your time cooking the flour and fat together until it reaches a deep chocolate brown color. This requires patience and constant stirring, but it’s what gives gumbo its distinctive flavor and color.
How do I prevent my vegetables from getting mushy in stew?
Add different vegetables at different times based on how long they take to cook. Root vegetables go in during the last hour, quick-cooking vegetables like peas in the final fifteen minutes. This keeps everything properly cooked without overcooking.

🍳 Precision Meets Passion — Tools Chefs Trust Daily

- Grams & ounces — precise to 1g
- Perfect for baking & keto tracking
- Sleek stainless steel design

- German stainless precision
- Razor-sharp & dishwasher-safe
- Elegant wood block organizer

- Premium Stainless Steel Build
- Easy to Clean & Dishwasher Safe
- A Must-Have Kitchen Tool